REVIEW · ROME
Unique Photo Tour and Workshop in Rome Dusk to Dawn
Book on Viator →Operated by RomePhotoFuntours Giulio D'Ercole · Bookable on Viator
Rome at night feels like a secret. This dusk-to-dawn photo workshop is built for getting killer shots of iconic Rome when most people are asleep, with a guide who focuses on real camera settings and real composition. I love the small group of four (less waiting, more individual help), and I love that you get on-the-spot guidance for the exact problems that show up at night. One possible drawback: you’ll be out late, and the night-to-dawn schedule means you’ll need to stay steady through long stretches of walking plus tripod time.
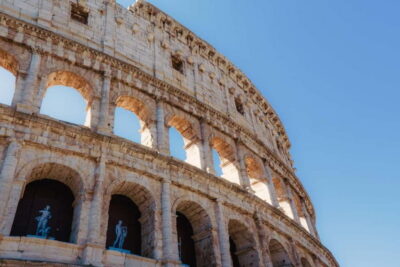
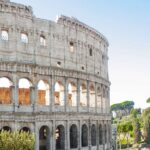
You also get private transportation, so you can move between major sights without burning energy in Rome traffic. Starting at 10:00 pm near Castel Sant’Angelo and running about 7 hours, the goal is to capture the city from night through blue hour into sunrise, including scenes like the Colosseum when the light is at its most dramatic.
In This Review
- Key highlights to look forward to
- Rome Dusk to Dawn: the real point of shooting at night
- Small group + private transport: comfort that actually helps your photos
- Giulio D’Ercole’s guidance style: settings and timing that click
- What you’ll learn: night photography skills that transfer anywhere
- From 10:00 pm into sunrise: how the light evolves on this route
- Stop-by-stop: how each location can shape your night shots
- Piazza del Campidoglio: symmetry you can actually build on
- The Pantheon: controlled drama around the oculus
- Piazza Navona: reflections, fountains, and layered foregrounds
- Museo Nazionale di Castel Sant’Angelo: riverside light and long-exposure texture
- St. Peter’s Square: dawn color and big architectural lines
- Teatro di Marcello: ruins with strong shadows
- Piazza Venezia: city-center light and practical framing
- Isola Tiberina: reflections and the river’s glow
- Rione Parione: quieter streets for storytelling frames
- Tempio di Vesta: small-scale subject, big payoff
- Terme di Caracalla: scale and controlled exposure
- Fontana di Trevi: fountain glow and highlight control
- Gear, rentals, and what you need to bring
- Price of $420.08: what you’re really paying for
- Who this workshop suits best
- Optional photo review: using your results to improve
- Should you book the Rome Dusk to Dawn photo workshop?
- FAQ
- How long is the Rome Dusk to Dawn photo tour?
- What time does the tour start?
- Where do we meet if we don’t get pickup?
- Is pickup available?
- How many people are in the group?
- Is the tour available in English?
- Can I rent camera gear if I don’t have one?
- What happens if the weather is poor?
Key highlights to look forward to
- Small-group coaching (max 4 people) so you’re not stuck guessing between other photographers
- Night photography skills you practice, not just talk about (long exposures, ISO, white balance, shutter/aperture)
- Timed light changes, from night darkness to blue hour and golden sunrise
- A route designed to beat crowds, so you can frame landmarks without a wall of people
- Composition drills in real places, using symmetry, leading lines, and layered foregrounds
- Optional image review, if you want detailed feedback after the shoot
Rome Dusk to Dawn: the real point of shooting at night
Night photography in Rome is not just about darkness. It’s about control. You’ll be working with streetlamps, building glow, window light, fountain reflections, and that thin band of sky color called blue hour. The workshop’s big advantage is that it treats those challenges as a training plan, with practice scenes and guidance that match what you’re actually seeing.
This is also one of the few ways to photograph Rome’s top monuments without constantly fighting crowds. With a small group and a late start, you’re more likely to find cleaner angles for shots that normally look like a postcard carousel.
The tone here is practical. You’re not being lectured while you freeze. You’re shooting, adjusting, and learning how to make the camera behave when the light gets weird.
You can also read our reviews of more photography tours in Rome
Small group + private transport: comfort that actually helps your photos
A max group size of four changes the whole experience. If your tripod needs redoing, you won’t have to wait your turn while the line grows. If you’re struggling with manual mode or your exposure looks too bright or too dark, you can get direct feedback quickly. That matters, because night photography rewards speed and small adjustments, not perfect setups done once.
Private transportation is another quality-of-life upgrade. Rome is great for walking, but at 11:30 pm you want to spend your energy on the scenes, not on transit friction. Having the option to travel by car helps keep you on schedule for the best light windows and reduces downtime.
If you want to move from beginner to intermediate faster, the combination of small-group attention plus transport is a real value. You’ll spend more time shooting and less time waiting.
Giulio D’Ercole’s guidance style: settings and timing that click
This tour is run by RomePhotoFuntours Giulio D’Ercole, a Rome-based guide who ties photography technique to what you’re photographing. The most praised part of the experience is the combination of patience and real help with camera settings, including how to execute shots from tripod setup through the final frame.
You’ll also benefit from practical timing choices. From the way the tour is described, the guide pays attention to things like traffic flow and the position of the sun as the night turns into dawn. That’s not trivia. It affects whether you can keep long exposures clean or whether moving lights ruin your frame.
A nice bonus is that the guide blends photography with enough context about the sights to make the images feel intentional. You’re not just collecting dark silhouettes; you’re learning how to tell a story with the location.
What you’ll learn: night photography skills that transfer anywhere
This workshop teaches night photography through hands-on practice, especially if you’re ready to move beyond auto mode. The focus is on the exact tools that control exposure and color at night, plus composition choices that make a landmark photo look like it was made by a person, not a phone.
Here are the core skills you’ll work with:
- Long exposures: how to slow the shutter and still keep your image sharp where it counts
- Light balance: how mixed lighting (warm streetlights and cooler sky tones) changes the look of your photo
- ISO control: when to boost sensitivity and when to stop, so noise doesn’t win
- White balance: how to keep colors believable or intentionally stylized
- Aperture and shutter speed in manual mode: the practical tradeoffs you feel in the viewfinder
- Tripod technique: stable setup so your shots aren’t soft or inconsistent
On top of the technical side, you’ll practice composition methods like leading lines, symmetry, and adding foreground interest and layering. These are especially important at night, because without good composition, everything just turns into a bright object floating in darkness.
From 10:00 pm into sunrise: how the light evolves on this route
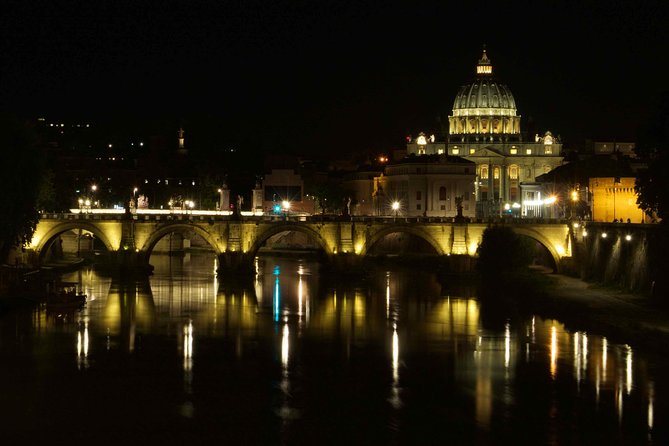
The tour is designed for the full arc of nighttime light, including the shift from night to blue hour and then into sunrise colors. That matters because Rome changes fast at these hours. In the dark, you can exaggerate contrast and make monuments feel monumental. In blue hour, the sky starts to glow, and distant details reappear without overpowering the scene. At dawn, warmer tones can turn stone and fountains into something almost alive.
A late-night start also helps with the crowd problem. You’re more likely to find quieter streets and cleaner frames, especially around big central landmarks.
The main thing to plan for mentally: you’ll be awake through shifting conditions. That’s why real-time feedback is so useful. You can correct your settings as the sky changes, instead of waiting until everything is over to realize your color is off.
You can also read our reviews of more tours and experiences in Rome





Stop-by-stop: how each location can shape your night shots
Below is how the workshop’s sights connect to photography opportunities. The guide will help you find angles and camera settings for what you’re trying to capture.
Piazza del Campidoglio: symmetry you can actually build on
At Piazza del Campidoglio, you get a strong sense of order even when it’s dark. It’s a good place to practice symmetry and leading lines because the geometry of the space helps your composition without you forcing it.
Night adds mood: stone surfaces glow differently, and reflections or nearby light sources can add texture. The practical goal is to frame the scene with clean edges and controlled highlights, so the brightest lights don’t blow out your highlights.
The Pantheon: controlled drama around the oculus
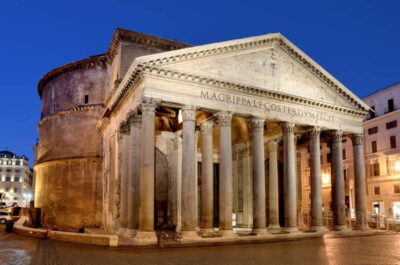
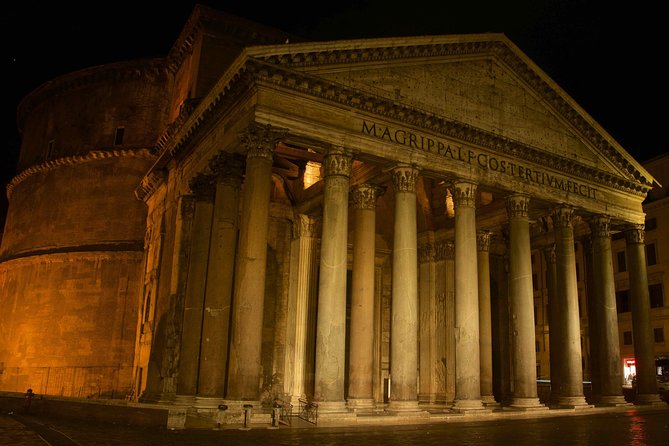
The Pantheon is all about light. Even when the outside is busy in daytime, at night it can feel like you’re working in a studio. It’s a great spot to experiment with long exposures and to think about white balance and how the sky and interior lighting affect color.
Watch your exposure carefully. With bright points of light and deep shadows, it’s easy to overdo brightness and lose the contrast that makes night photos look cinematic.
Piazza Navona: reflections, fountains, and layered foregrounds
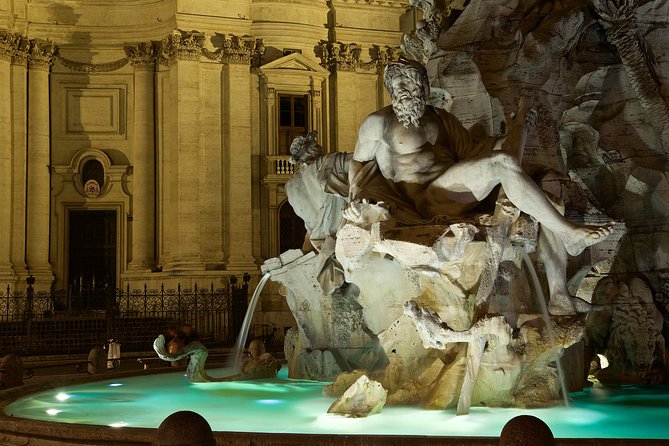
Piazza Navona is ideal for practicing depth. You can add foreground interest (nearby textures or street elements) and layer the scene so the monument doesn’t look flat. The shapes of the square naturally guide the eye, which helps when you’re slowing your shutter and planning your composition.
This is also where mixed lighting can show up in a big way. Streetlamps, bright architectural lighting, and fountain glow can fight for control. Use the camera settings practice here to keep your image consistent.
Museo Nazionale di Castel Sant’Angelo: riverside light and long-exposure texture
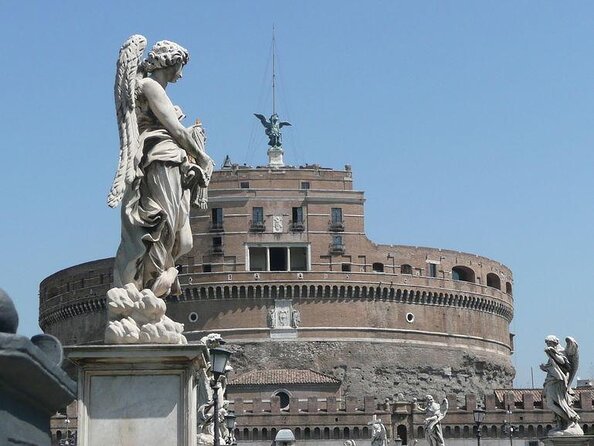
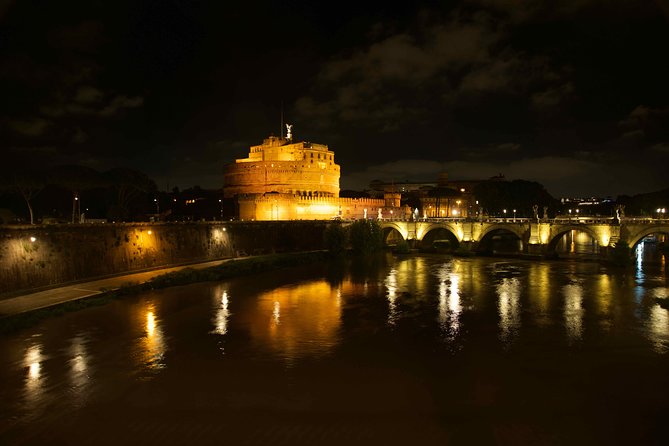
Castel Sant’Angelo is a classic nighttime subject, especially because the area around it offers different lighting sources and visual depth. You can work on long-exposure technique while also practicing how to use surrounding light to give your frame structure.
The area near the meeting point (Lungotevere Castello) makes it convenient to start or regroup if needed. You can focus on steady tripod setup, then try variations to see what exposure and color choices do to the atmosphere.
St. Peter’s Square: dawn color and big architectural lines
St. Peter’s Square is a prime place to experience the shift from blue hour to early sunrise. That change in the sky tone is not just pretty. It makes your exposures more interesting and gives your whites and stone colors a new range.
This is where you’ll likely want to commit to careful exposure control. You’ll be balancing sky glow, bright architectural lighting, and the feeling of scale. If you nail it, the photo looks like Rome was built for morning light.
Teatro di Marcello: ruins with strong shadows
Ruins are forgiving when you approach them correctly. At night, shadow shape becomes your texture, and the broken forms can look crisp in long exposures if you keep your tripod stable.
This location works well for practicing composition that doesn’t rely on crowds. Try to frame negative space, highlight repeating lines, and use controlled exposure to keep highlights from washing out the darker stone.
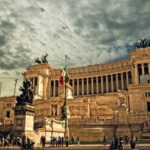
Piazza Venezia: city-center light and practical framing
Piazza Venezia can teach you how to work with a scene full of competing light sources. When multiple bright elements are in your frame, it’s easy to end up with an image that looks harsh or flat.
Your guide’s technical coaching helps here. You’ll learn how to pick your exposure priorities: what you want sharp and readable, what you can let fall into shadow, and how to keep color from turning muddy.
Isola Tiberina: reflections and the river’s glow
An island on a river sounds simple, but at night it becomes a reflections playground. You can work on long-exposure choices that keep the water calm enough to show shape, while still keeping the monument readable.
This stop is also a chance to practice layering: isolate the subject, then add a foreground element or a secondary light source so the scene has depth.
Rione Parione: quieter streets for storytelling frames
Not every strong night photo is a major monument. Rione Parione offers smaller-scale scenes where narrow streets and building edges help you practice how to frame a story instead of a postcard.
This is where leading lines and foreground interest shine. Look for passages that pull you toward a brighter destination, then adjust your composition so you’re not just capturing darkness—you’re guiding the viewer.
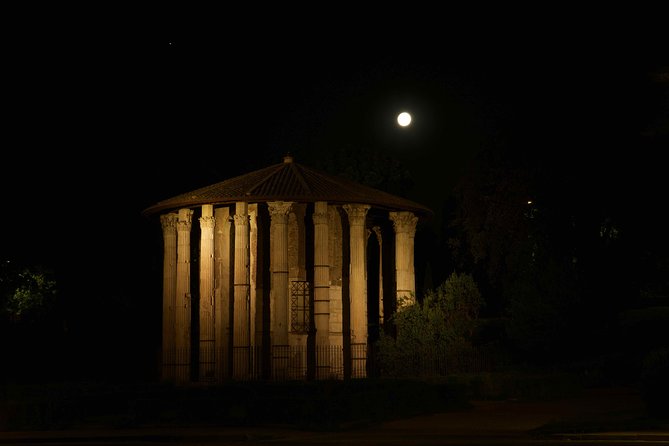
Tempio di Vesta: small-scale subject, big payoff
Tempio di Vesta rewards careful framing. With fewer elements in the scene, it’s easier to see how changing shutter speed, ISO, and white balance affects the look instantly.
This is a great stop for practicing precision. Try different exposures on the same composition, then compare. You’ll feel how highlights and shadows respond, which is the kind of knowledge that makes future night photos easier.
Terme di Caracalla: scale and controlled exposure
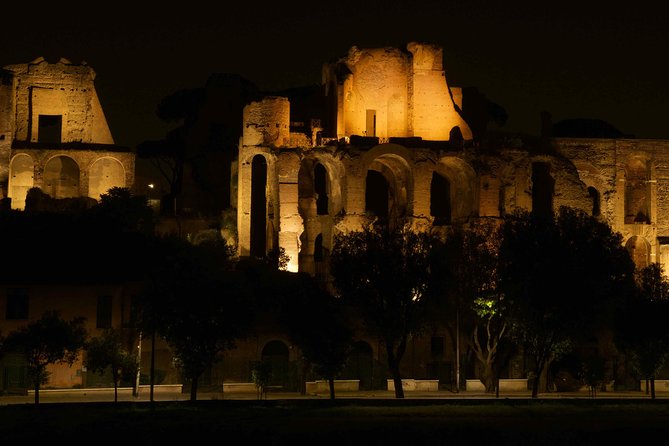
The Baths of Caracalla are huge, which means your main challenge is deciding what part of the space you want to emphasize. Wide compositions can look impressive, but night lighting can also make large areas feel flat if your exposure is off.
Use this location to practice planning your frame before you shoot. Think about whether you’re using architecture, repeating columns, or light falloff as your main visual structure.
Fontana di Trevi: fountain glow and highlight control
Fontana di Trevi is one of the hardest places to photograph well at night because the fountain lighting is intense and water can create tricky brightness patterns. This is exactly where your night technique practice helps: you’ll learn how to keep highlights from blowing out and how to use long exposures without losing detail.
It’s also a perfect test of composition. The fountain is iconic, so your job is to make your photo feel personal—through angle, foreground choices, and how you handle reflections and sky tone.
Gear, rentals, and what you need to bring
The workshop includes a professional photographer guide and private transportation, but camera gear is not automatically included. If you don’t have a camera, you can rent Nikon gear plus tripods for 50 euros per kit, payable in cash.
If you already own a camera, the main value is that the guide helps you work in manual mode and adjust settings live. Night photography doesn’t reward guesswork, so having a camera you can control (not just point-and-shoot limits) will help you get the most from the coaching.
Tripods matter here. Even if you can shoot handheld, the best long-exposure look typically comes from stable support and consistent setup.
Price of $420.08: what you’re really paying for
$420.08 per person is not cheap, so you’ll want to be clear on the value. For this price, you’re paying for a private-transport, small-group workshop focused on practical coaching at multiple major locations in a single evening.
The biggest “value lever” is the combination of:
- max 4 people, meaning real feedback time
- a professional guide who focuses on settings and execution, not only viewpoints
- a route designed around the night-to-sunrise light shift
If you’re serious about leveling up, this can cost less than multiple “look-only” tours plus workshops after you realize your photos weren’t technically where you needed them. If you’re a true beginner using only auto mode, you might find it more difficult to keep up, unless you’re willing to learn settings quickly.
Who this workshop suits best
This is best for intermediate enthusiasts and passionate beginners who are ready to move beyond auto. If you’ve been taking decent photos by daylight but night shots turn into overexposed blobs or noisy disappointments, this workshop is built to help you fix those issues fast.
It also suits people who:
- want unique Rome images taken with fewer crowds
- like hands-on instruction and immediate feedback
- enjoy planning around changing light
- can handle late nights and early mornings
If you’re purely after a sightseeing night walk with casual photos, you may feel the focus is too technical. But if you want to learn the camera, this is the right kind of serious.
Optional photo review: using your results to improve
There’s an optional photo review where you can submit your images for detailed critique and tips for improvement. If you’re the type who learns best by comparing your intent to the results, this extra step can turn your night shoot into a mini learning loop.
Even without the review, the on-the-spot coaching during the session is meant to help you adjust as you go, so you’re not stuck repeating the same mistake all night.
Should you book the Rome Dusk to Dawn photo workshop?
Book it if your goal is to produce night images that look intentional: controlled exposure, good color, and smart composition. The small group of four, the practical manual-mode coaching, and the focus on the night-to-blue-hour-to-sunrise light change are the reasons this works.
Don’t book it if you want a relaxed, casual stroll and you’re not interested in camera settings. Also think about your stamina: this runs about seven hours starting at 10:00 pm, so you’ll be working through the long late-night stretch.
If you want Rome with fewer crowds and photos that show real technique, this is a strong choice.
FAQ
How long is the Rome Dusk to Dawn photo tour?
It runs for about 7 hours.
What time does the tour start?
The start time is 10:00 pm.
Where do we meet if we don’t get pickup?
Meet at the entrance of Castel Sant’Angelo, opposite the Bridge of Angels on Lungotevere Castello, 50, 00193 Roma RM, Italy.
Is pickup available?
Yes. Pickup is available upon request at your hotel, Airbnb, or home.
How many people are in the group?
The tour is limited to a maximum of 4 travelers.
Is the tour available in English?
Yes, it’s offered in English.
Can I rent camera gear if I don’t have one?
Yes. Nikon gear plus tripods can be rented for 50 euros per kit, payable in cash.
What happens if the weather is poor?
This experience requires good weather. If it’s canceled due to poor weather, you’ll be offered a different date or a full refund.